Creating a Patch
All patches require a Patch Server residing inside a Patch Server Group. Instructions for creating them are covered in Creating Patch Servers and Groups. The following instructions proceed with the assumption that you have already created a Patch Server and Patch Server Group.
Note: The Patch tab is only visible to Administrators and Users with the Patch Administrator privilege selected in their ICE account.
To create a patch
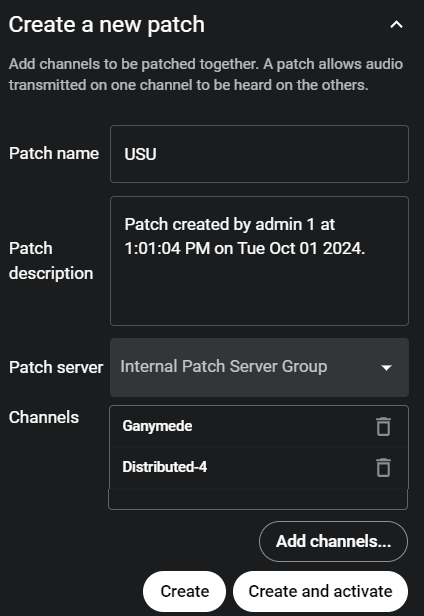
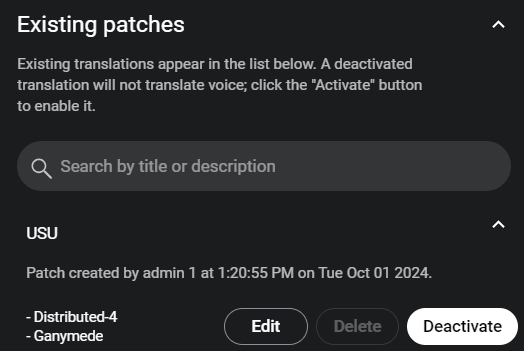
1. From the Dashboard, click the Patch tab to open the Create a New Patch window. 2. In the Patch Name field, enter a name for this patch. If left blank, the default name will be the names of the channels in the patch. 3. In the Patch Description field, enter a description for this patch. The default description is: Patch created by [username] at [Time] on [Date] 4. In the Patch Server list, select from the available patch servers on the system. 5. In the Channels field, drag and Drop channel panels into the box to add them to the patch, or click the Add channels button to select channels from a list. 6. Click the Create button to save the patch configuration into the list of existing patches without Activating the patch. 7. Click the Create and Activate button to save the patch configuration into the list of existing patches and activate the patch on the designated Patch Server. 8. The patch appears in the list of patches at the bottom of the Patch tab (shown below). |  |

When activated, audio flows both ways across the selected channels.