skip to main content
ICE Server Configuration
Important: If you have a Call Manager configured as SIP registrar, you need to delete the configuration before configuring it as a SIP Trunk. Likewise, If you have a Call Manager configured for the SIP Trunk , you need to delete the SIP Trunk configuration on Call Manager before toggling to re-use as SIP registrar as same ICE Telephony Server cannot be used in the SIP Trunk.
To configure ICE Server
1. Log in to ICE Desktop as admin user.
2. In the Settings-> Telephony > PBX tab, add your Call Manager to the ICE Server as SIP Trunk. Fill Mandatory fields of Name and IP Address along with port 5060. Description is an optional field.
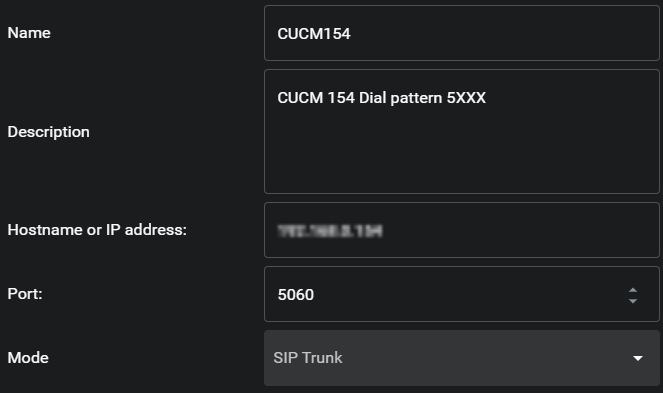
A screenshot of a phone Description automatically generated
3. Configure users with assigned Directory Number(DN) and selecting the Call Manager configured above
4. Configure few channels with assigned DNs and selecting the Call Manager field.
Notes:
*DNs from one user/channel cannot be re-used for other channels/users. Each DN needs to be unique.
*SIP Trunk documentation on route pattern on Call Manager says * and # are used in special cases like below, so avoid * and # when configuring User and Channel DNs
*The asterisk (*) character can provide an extra digit for special dialed numbers. You can configure the route pattern 411 to provide access to the internal operator for directory assistance.
*The octothorpe (#) character generally identifies the end of the dialing sequence. The # character must be the last character in the pattern. The route pattern 901181910555# routes or blocks an international number dialed from within the NANP. The # character after the last 5 identifies this as the last digit in the sequence.