
E. Obtain the Browser Access Code
To obtain the browser access code
1. In the terminal window, use tab or Ctrl+N to advance past the Start and Node Config screens to get to the Access Code screen.

Advance both DC1 and DC2 terminals.
2. Press the Enter key to generate a URL (https://[IP address of the VM]:8999) and an access code. Both are displayed in the top, right corner of the screen.
The access code is valid for 5 minutes. If it expires before being used, simply return to the above page and generate a new browser access code. The URL will remain the same.
3. Open a browser and navigate to the URL. Paste or enter the Access Code.
The ICE OS Configuration Wizard for this VM opens.
The ICE OS Configuration Wizard for this VM opens.
Note: If the browser displays the 'Your connection is not private' warning, then ignore the warning and advance past.
Generate access codes for both DC1 and DC2, and keep both terminal windows open. Even though the DC2 access code is not required yet, generating it now initiates some required processes.
To verify the network connection
1. Open a third terminal window.
2. In DC1, enter:
ping [IP address of the DC1 VM]
The following screenshot is an example of a command and successful results:
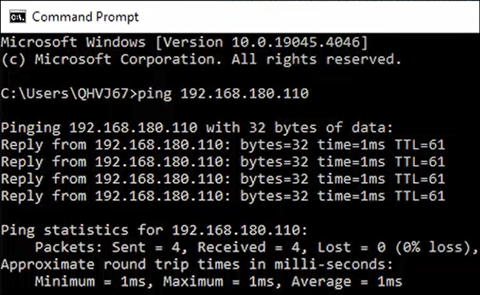
ping [IP address of the DC1 VM]
The following screenshot is an example of a command and successful results:
3. In DC2, enter:
ping [IP address of the DC2 VM]
ping [IP address of the DC2 VM]
4. If either ping commands do not succeed, then troubleshoot the network connection before proceeding. If both ping commands succeed, proceed to the ICE OS Configuration Wizard section (next).