Installing ICE Server Using EKS via ECR
Use the following procedure to install an ICE Server to an Amazon cloud repository using Amazon EKS and Amazon ECR.
To install the ICE Server using EKS via ECR
1. Pull the latest charts for the ICE Cloud Configuration Wizard.
helm pull oci://docker.io/instantconnect/icectl --version number –untar
2. Replace number with the number of your release. For example:
helm pull oci://docker.io/instantconnect/icectl –version 3.6.6:45204 –untar
3. Change file permission to allow execution of cloud_icectl_360.sh.
cd icectl && chmod +x tools/cloud_icectl_360.sh
4. Run the ICE Cloud Configuration Wizard chart installation. For example:
./tools/cloud_icectl_360.sh -v 3.6.6:45204.
5. In the output, move to the bottom and identify the ‘Application is available at:’ address and the ‘Browser Access Code.’ You will need these values.
NOTES:
Application is available at:
- https://k8s-icesetup-icectllb-58e140b386-2dd8908098097d.elb.us-east-2.amazonaws.com:30999
It may take up to 2 minutes for icectl to initialize.
Browser Access Code: 7IlvSS
To get a new Browser Access Code or run a new version of icectl:
cloud_icectl_360.sh [-v VERSION] [-o OCI_REGISTRY] [-b] [-p HTTPS_ACCESS_PORT]
6. Open the ICE OS Cloud Configuration Wizard.
A. From the returned text, copy the URL supplied after Application is available at. For example:
Application is available at:
- https://k8s-icesetup-icectllb-123somelongnumber123.elb.us-east-2.amazonaws.com:30999
B. Open a browser and paste the URL into the address bar.
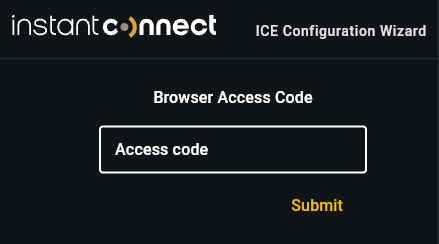
The ICE Configuration Wizard opens to the Browser Access Code screen.

The ICE Configuration Wizard opens to the Browser Access Code screen.

Note: Due to DNS record updates, it can take 1-5 minutes before the app becomes available.
C. From the returned text, copy the code provided after Browser Access Code.
Browser Access Code: 7777777
D. Paste the Browser Access Code into the Access code field and then click Submit.
7. Click Profile and perform the following:
A. In the Use Profile menu, select the profile for the ICE Server you wish to deploy.
B. Select Deploy Multinode ICE if your cluster consists of 3 nodes.
8. In the Network page, provide values for your configuration.
9. In the Version page, ensure the following values are set:
A. Helm repositroy provider: aws
B. Username: AWS
C. Password: obtain password by executing:
aws ecr get-login-password --region <ecr region>
aws ecr get-login-password --region <ecr region>
Note: You must be logged in to obtain the password. The authorization token is valid for 12 hours.
10. In the Installation Package field, you can deploy from your own repository, or the Instant Connect repository.
A. To deploy from the Instant Connect repository, the entry should appear similar to the following:
oci://187649263256.dkr.ecr.us-east-2.amazonaws.com/instantconnect1/instantconnect2/ice-helm-operator-release-3-6-0
Where:
187649263256.dkr.ecr.<ecr_region>.amazonaws.com - registry url
Instantconnect1 - name of pull through cache rule
Instantconnect2 - upstream repository name (docker hub repo)
B. To deploy from your own repository, the entry should appear as follows:
oci://187649263256.dkr.ecr.us-west-1.amazonaws.com/cache-icengineering/instantconnectengineering/ice-helm-operator-develop
Where:
187649263256.dkr.ecr.<ecr_region>.amazonaws.com - registry url
cache-icengineering - name of pull through cache rule
instantconnectengineering - upstream repository name (docker hub repo)
11. Complete any remaining fields in the ICE OS Cloud Configuration Wizard as needed, and then click the Install/Upgrade button.