Creating a Patch
The following instructions assume you have access to the Patch tab. If you require the ability to patch channels, and the Patch request the Patch Administrator privilege from your ICE Administrator.
Important: ICE prevents the patching of Channels with different Duplex settings. If you attempt to add a channel but cannot, then verify their Duplex is identical.
To create a patch
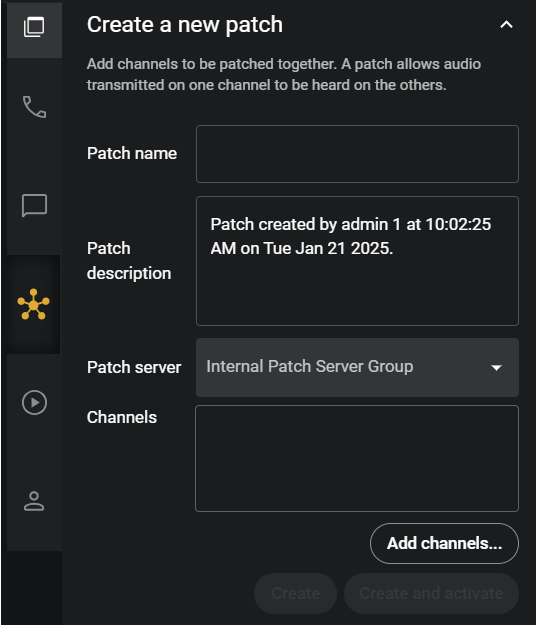
1. From the Dashboard, click the PATCH tab to open the Create a New Patch window.


2. In the Patch Name field, enter a name for this patch. If left blank, the default name will be the names of the channels in the patch.
3. In the Patch Description field, optionally enter a description for this patch. The default description is: Patch created by [username] at [Time] on [Date]
4. In the Patch Server list, select from the available patch servers on the system or use the default Patch Server.
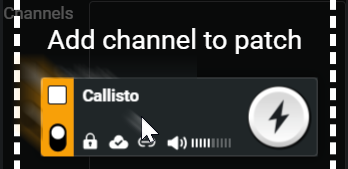
5. In the Channels field, drag and drop the desired channel panels into the box to add them to the patch,

–OR –
Click the Add channels button to select channels from a list.


–OR –
Click the Add channels button to select channels from a list.
Note: Once you have selected the first channel, ICE prevents the addition of channels with incompatible Duplex settings. Only channels with identical duplex settings may be patched.


6. Click the Create button to save the patch configuration into the list of existing patches without Activating the patch.
7. Click the Create and Activate button to save the patch configuration into the list of existing patches and activate the patch on the designated Patch Server.
Note: The Create button creates the patch deactivated, allowing you to activate it later.