Editing Channel Assignments
Use the People or Channels pages to assign channels to users. If you are editing the channels of an individual user, then use the People pages. If you have many users that all need the same channel(s) then use the Channels pages to assign the channels to the People.
To add a user to a channel
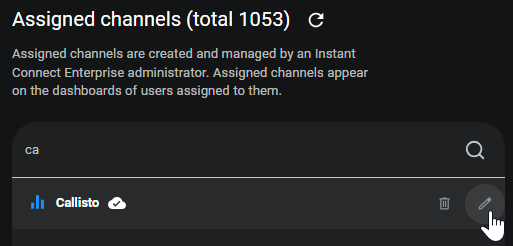
1. Navigate to Settings > Channels.
2. Enter the name of the channel in the search box.
3. Click the Edit (pencil) icon to open the channel for editing.

The channel opens for editing.

The channel opens for editing.
4. Expand the Add People section.
A. Use the Add People section to search for other ICE users to add to this channel. Click the Add '+' icon next to the Name of the user to add them to the channel.
B. Use the People Assigned to this Channel section to search the list of assigned users. Click the Delete (trash) icon next to the Name of the user to remove them from the channel.
5. Click the Save button.
To add a channel to a user
1. Navigate to Settings > People.
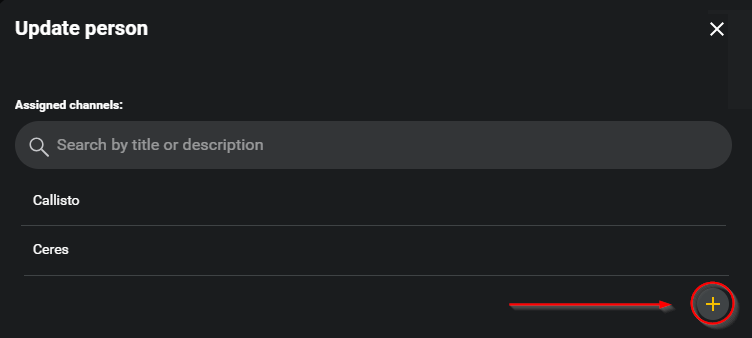
2. Locate the user to modify and click the Edit (pencil) icon.
The Update Person screen opens.

The Update Person screen opens.

3. Scroll to the bottom of the Assigned Channels list and click the Add '+' icon.
The Assign Channels screen opens a list of all Assigned Channels in your ICE Organization.
The Assign Channels screen opens a list of all Assigned Channels in your ICE Organization.
4. Enter the name of the channel in the search box.


5. Click the Add '+' icon to add the channel.
6. Click OK.
The Assign Channels screen closes.
The Assign Channels screen closes.
7. In the Update Person screen, click the Update button.
If the user is logged in, they will be notified. If not, the new channel appears inactive in the channel list when they next log in to ICE Server.
If the user is logged in, they will be notified. If not, the new channel appears inactive in the channel list when they next log in to ICE Server.