Creating a Translation
Only Admins or users with the Patch Administrator privilege can create and activate translations.
Important: Verify that all Channels to be used for translation are set to different Spoken Languages and Translation is enabled.
To create a translation
1. Navigate to Settings > Translations.
2. In the Name field under Create a New Translation, enter a name to identify this Translation.
3. In the Description field, Optionally, enter a description for this Translation.
4. In the Translation Server menu, select a translation server.
5. Click the Add Channels button.
6. Select the channels to be translated. Note that this list only shows channels with Translation enabled. If a channel is not in the list, go to Settings > Channels and edit the channel so that Translation is enabled.
7. Click Create if you want to start with the Translation off, or click Create and Activate.
8. In ICE Desktop, verify the channels are patched.
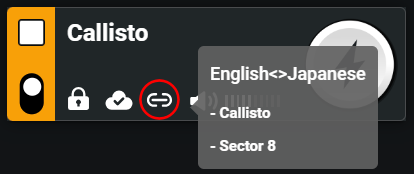
Click the Patch icon to view the channels in the patch hosting the Translation.

Click the Patch icon to view the channels in the patch hosting the Translation.