Finishing Upgrade Installation
Once you have completed the configuration of your ICE OS Server, use the following procedure to initiate the installation of the server components.
If you are supporting georedundancy, then use the following steps to complete the configuration of DC1. For DC2, follow the additional steps in GEOREDUNDANCY.
To complete installation
1. Before taking any action on the Finish screen, open the Status dropdown and verify that all of the following status indicators show green.
If any of the above are NOT green, then wait for them to turn green. Do not use the web browser refresh button to update the screen. Instead, select the Wizard Refresh button at the bottom left to get the latest status, or open their Status window to see their progress.
Note: If you accidently select Install/Upgrade before the air gap extraction completes, then wait for the extraction to complete, then re-select Install/Upgrade.
If you open Air-gapped Extraction Status to track its progress, you may notice some files notated as 'Skipping', this means the existing file from installation remains unchanged for the upgrade, so it does not need to be extracted again.
2. Select Install/Upgrade ICE Server to apply all the configuration settings.
The Beginning System setup notification displays.
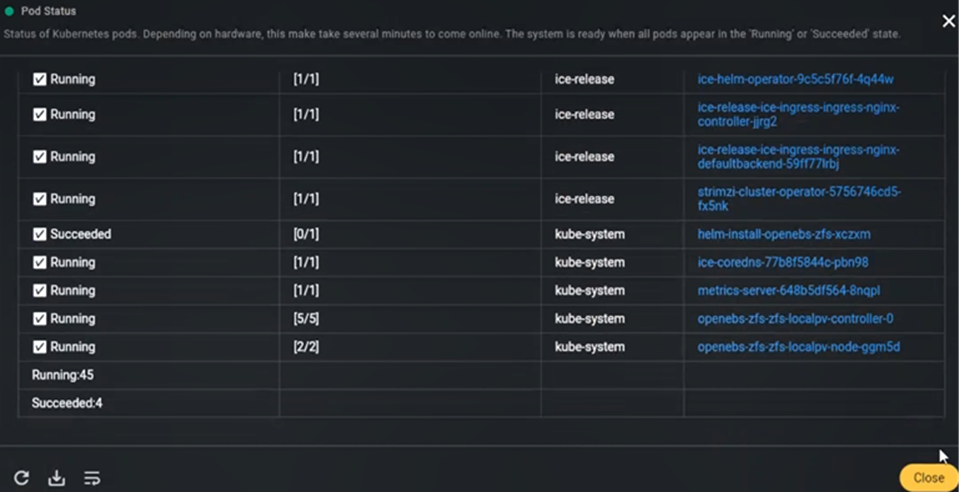
3. The process is complete when Pod Status returns to green. The following screenshot shows an expanded Pod Status after the process has completed:


The Single Node ICE Server upgrade is now complete. Proceed to the Single Node Deployments section.
GEOREDUNDANCY:
When configuring for Georedundancy, one of the steps is time dependent. There is a four minute window between the activation of the DC1 upgrade and the activation of the DC2 upgrade. This window starts one minute after initiating the upgrade on DC1 and it ends four minutes later.
To complete Georedundant installation
1. Perform the finish steps for DC1 and select Install/Upgrade on (DC1) .
Note: Pod Status will not return to green until both DC1 and DC2 are upgraded.
2. Once installation of DC1 begins, wait a minimum of 1 minutes, but no longer than 3 minutes, before clicking install on DC2.
Important: Do not wait longer than 3 minutes before initiating the DC2 installation.
3. Perform the above steps for Finish (DC2).
4. Wait for the upgrade to be completed.
5. Keep Checking the Status for Helm Release & Kubernetes Pods. Once both are Green, the upgrade is successful.
6. Post upgrade data synchronization steps required on both single node and georedundant deployments.

If the indicator is red, then perform the following: Connecting the Health Status Websocket.