
Entra ID - Azure Configuration Instructions
The instructions in this section explain how to configure Entra ID in Microsoft Azure. This process is external to the ICE Server and relies entirely on access to your Azure account.
Use the following instructions to create an application resource in your Entra ID system that Instant Connect client applications will use to authenticate against.
Note: After completing this procedure, follow the Entra ID – ICE Server Configuration Instructions to configure the ICE Server to use Entra ID for SSO.
To create an Entra ID application resource
1. Log into the Azure dashboard at https://azure.microsoft.com
2. Search for and choose the Microsoft Entra ID service.
3. Click the + Add drop-down button and choose App Registration.
The Register an application window opens.
The Register an application window opens.
A. Give the app a meaningful name of your choosing (this name is only used to identify the resource in the Azure portal; it does not affect authentication).
B. Choose a Supported account types option as appropriate for your organization.
C. In the Redirect URI section, choose Public client/native (mobile & desktop) and enter https://login.microsoftonline.com/common/oauth2/nativeclient as the URL.

4. Click Register.
5. In the Manage menu in the left frame, click Authentication.

A. Click the + Add a platform button, then click the Single-page application platform option.
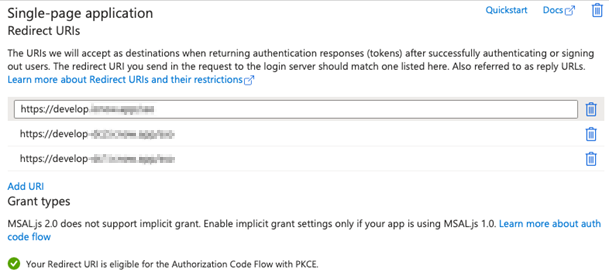
B. Enter the URL where the web client will be hosted. For example, if ICE Server is hosted at test.icnow.app then enter https://test.icnow.app/sso (ensure you include the /sso path).
Georedundancy: If you are supporting Georedundancy, then add both DC1 and DC2 addresses.
C. For systems that are accessible from multiple URLs (such as georedundant systems or IT environments with aliased host names), include each URL (appended with /sso) to the list of Redirect URIs.
D. In the Implicit grant and hybrid flows section, select Access token and then click Configure to dismiss the dialog.
E. Under the Mobile and desktop applications section, select https://login.microsoftonline.com/common/oauth2/nativeclient.

Note: It is not necessary to enable Allow public client flows under the Advanced settings section.
6. In the Manage menu in the left frame, click Expose an API.

A. Click the + Add a scope button. You will be prompted to first set an Application ID URI. Accept the default URI and choose Save and continue.
B. Complete the Add a scope form as follows:

a. Scope Name: UserProfile.ReadWrite (or a scope name of your choosing).

b. Who can consent: Admins and users (or Admins only if you want to require that an Azure admin grants users access before they can log in).

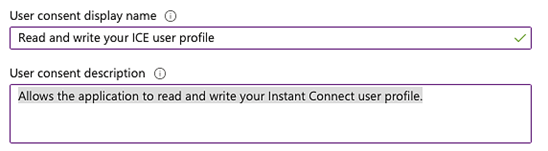
c. Admin/User consent display name: Read and write your ICE user profile (or enter an explanatory string of your choice; this will be displayed to end users).
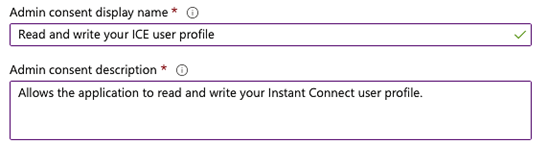
d. Admin/User consent display name: Allows the application to read and write your Instant Connect user profile. (or enter an explanatory string of your choice; this will be displayed to end users).
e. State: Leave as Enabled.

C. Click the Add scope button.

7. In the Manage menu in the left frame, click API permissions.

The Request API Permissions page opens.
The Request API Permissions page opens.
A. In the Permission section, remove the User.Read permission under Microsoft Graph (populated by default), by clicking the ... menu and then clicking Remove permission.
Important: Ensure removal of all Microsoft Graph permissions. Failing to remove permissions results in Entra ID producing a JWT that cannot be validated by Instant Connect. A JWT token of this type contains a nonce in the header. These JWTs are intended to be consumed only by Microsoft-internal services.
B. Click the Add permissions button:
a. Click the APIs my organization uses tab, then click the name of this app (the name you gave the app registration in the first step, Instant Connect Enterprise in the illustrated example).
b. Select the scope created in Step 5 (UserProfile.ReadWrite).

c. Click Add permissions.
8. In the Manage menu in the left frame, click Token configuration and perform the following operations.

A. Click the + Add groups claim button and perform the following:

a. Select the type of groups that Instant Connect should have access to. Groups are used to assign users to assigned channels. Choose the group types that will be used to associate users to channels. Most organizations will probably choose Directory roles and/or Security groups.
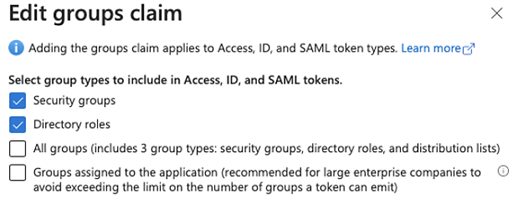
b. Expand the Access toggle panel under Customize token properties by type and choose sAMAccountName. This will assure that the JWT token produced by Entra ID contains the name of the groups, not an ID or path.
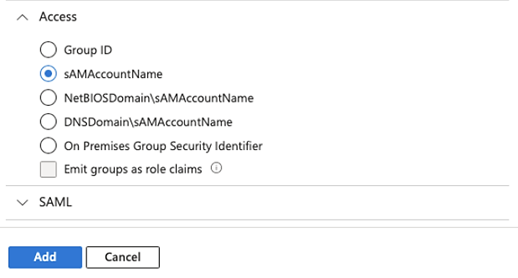
c. Click the Add button.
B. Click the + Add optional claim button and then perform the following instructions:
a. Select Access as the token type.

b. Under Claim select UPN (user principal name); this instructs Entra ID to include the user’s username in the JWT. Without this information, the ICE Server will reject the token.

c. Click Add. You will be prompted to Turn on the Microsoft Graph profile permission. DO NOT select this option (doing so will render the token inoperable with ICE). Click Add again.
d. Click the … menu next to the UPN claim and select Edit.
e. In the Edit UP (Access token) page, toggle-on the Externally authenticated option.

f. Click Save.
9. In the Manage menu in the left frame, click Overview.

Take note of the following values, as you will require them for operations later.
Take note of the following values, as you will require them for operations later.
You can now proceed to the next section (Entra ID – ICE Server Configuration Instructions) to configure the ICE Server to interoperate with Entra ID for user authentication.